Dull but sharp
Enhance the light, then upscale only when you need more pixels.
Upscale adds pixels. It does not undo camera shake, and it does not invent a texture the camera never caught. 2× and 4× only.
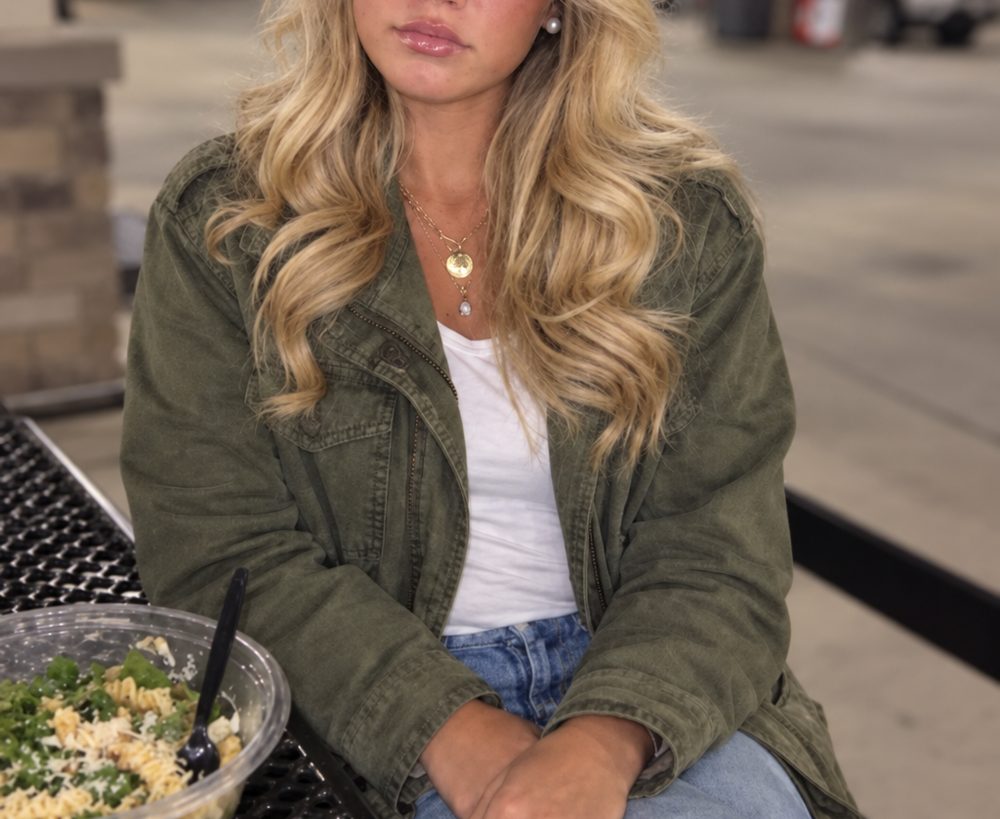
Utility jacket detail, half-resolution crop at 2×. Edge held, fabric readable.
1,600 × 1,200 px
Preview size at 2× — same crop
One free preview per day. New accounts start with 1 credit to download.
JPG, PNG, or WebP, up to 4 MB.
Failure note: if text in the result is wrong or doubled, discard it. If edges are smeared, unblur first.
The right input
The source is already sharp. It simply does not contain enough pixels for the place you want to use it.
The file is sharp and too small. A shop-page zoom turns into squares. A clean crop from a phone photo is still under 1000 px on the long side. An in-focus scan cannot fill a small print.
That is this page. The picture remains the same picture with more pixels. Its aspect ratio stays fixed. You do not choose inches; you choose 2× or 4× and read the output dimensions first.
Upscaling creates a larger dull photo. Fix the light.
Homepage enhancerHonest scale choices
2× is the default: a listing zoom, a social crop, or a slide. The model has enough of the original edge to extend it. Fabric, a bottle rim, and hair against a plain wall hold when the source was already sharp. Use 2× unless a 100% crop is still too small.
4× is for a small print or a tight crop you cannot reshoot. It is also where invented texture becomes visible. A weave can repeat. A freckle can become a dot that was not there. If a label was soft at 2×, 4× may make it sharper and wrong.
Larger option—not the recommended default.
A 400 px crop at 4× is still a 1600 px file, and its new detail is estimated. The control shows the math instead of hiding it behind a promise.
Inspect at actual pixels
Fit-to-screen hides both the blocks you wanted removed and the texture you did not want added.
It should be single and clean, not doubled or haloed.
Hair, fabric, or grain should not tile into a repeating pattern.
Letters must match the source. Changed letters make the result decorative, not a record.
If the eyes moved or became more detailed than the source, discard the result.
Order matters
Each model pass estimates a little. Three passes can produce a different photograph.
Do not upscale, unblur, and upscale again. Every pass invents a little; three passes invent a different photo.
Jobs that fit
The source is usually 800–1200 px, shot on a phone, and already in focus. 2× is enough for product zoom. Use 4× only when the template requires it, and check the label at 100%.
The face was sharp in the original and became small after the crop. 2× can make it frame-ready. It cannot turn a soft background person into a portrait.
Flatbed, in focus, no cracks: 2× or 4× can support a small print. Dust must be repaired first. Colorize is not part of this pass.
Upscale can ease JPEG blocks, but it cannot restore crushed UI text. Do not expect small type to become a reliable record.
Useful input range
The output math is simple. The quality limit comes from the source.
One free preview per day. New accounts start with 1 credit to download.
Pixel questions
No. Blur needs an unblur pass. This page adds pixels to a photo that is already clear enough.
2× doubles each side. 4× multiplies each side by four, so the output has sixteen times the pixels. 4× is where texture and text begin to be invented.
Only when it was already readable. A soft label can return with incorrect letters. Compare it against the source.
If the photo is dark or flat and still sharp, yes. If it is smeared, unblur first. Upscale should be last.
No. It keeps the same frame and aspect ratio and adds pixels.
JPG, PNG, and WebP files up to 4 MB.
One free preview per day. New accounts start with 1 credit to download.
You can, but you should not. Every pass estimates more texture. Return to the source and choose the scale once.
The source was too small or too soft for the chosen scale. Drop to 2× or fix the blur before enlarging.
The control shows the output before the model runs. Use 4× only when 2× is still too small and the 100% crop still looks like your photo.